Blog — Dr. Karen Wallace, ND | Dartmouth, Nova Scotia

gluten free

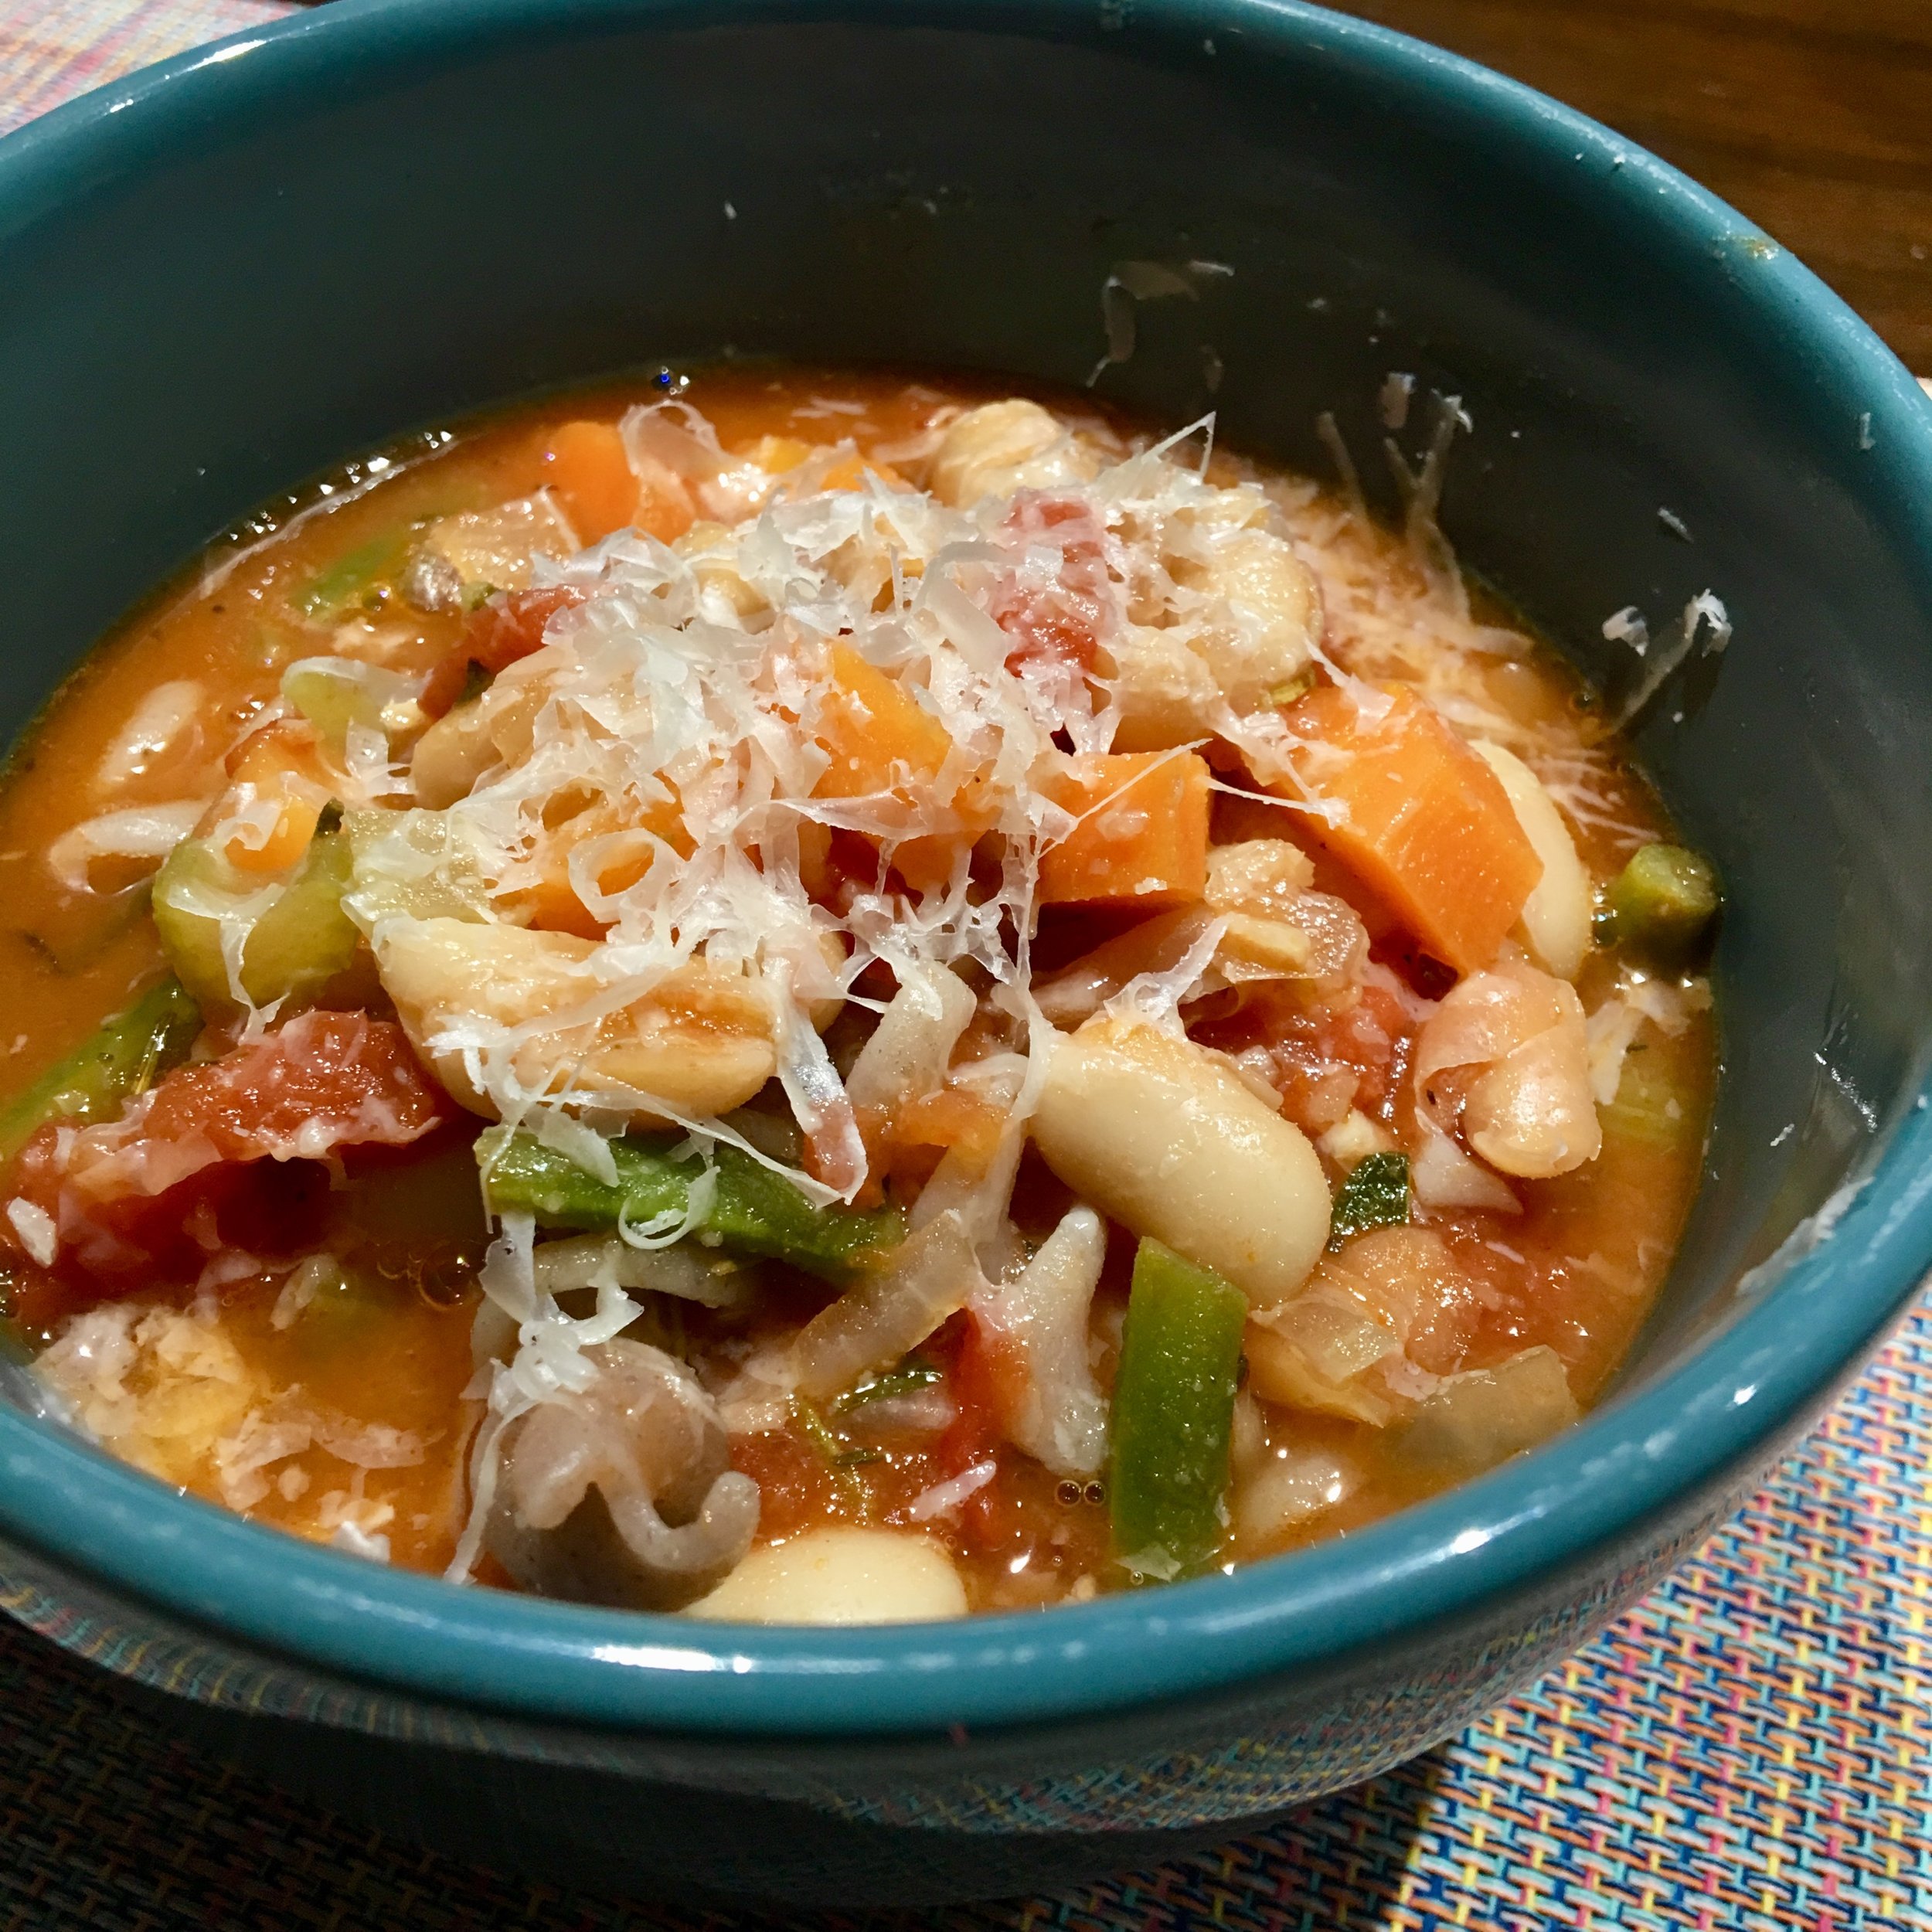
Food Friday: Anytime Minestrone Soup

IMG_1953.jpg

The rainy day this week finally got me craving some cozy soup and what better way to use up leftovers and random cans of beans than make a minestrone soup! To be honest, I have never made minestrone soup before, mostly because I don't usually like really brothy soups, BUT I have to say this is a winner! I made some adjustments to the typical soup recipe to make it more hearty and it turned out delicious! 

So, if you are in the mood for something cozy, yet still summery AND you want to use up those leftovers, look no further! :) Feel free to use any veggies you'd like in this one. 

Ingredients:

  • 4 cloves garlic, minced
  • 1/2 onion, diced 
  • 1/4 cup fresh basil, chopped
  • 1/2 tsp dried thyme 
  • 1/2 tsp dried rosemary
  • 1/2 tsp dried oregano 
  • 1 tbsp tomato paste
  • 14 oz can diced tomatoes 
  • 2 small celery stacks, diced
  • 2 small/medium carrots, diced
  • handful of green beans, trimmed and cut into pieces 
  • 1 cup gluten free pasta 
  • 1 19 oz can white kidney beans 
  • salt and pepper 
  • 3 cups chicken, veggie stock (or water and bullion cubes)
  • parmesan to sprinkle 

Directions:

  1. Heat 1 tbsp extra-virgin olive oil in a large pot or dutch oven over medium heat. Add onions and saute for a few minutes until golden. Add carrots, celery, garlic, basil, rosemary, thyme, oregano and some pepper and saute for a few minutes more until fragrant.
  2. Add tomato paste, diced tomatoes and stock and simmer covered until carrots are slightly tender, about 10 minutes. 
  3. Meanwhile mash 1/2 the beans with a fork - this adds a little more bulk to the soup. Cook pasta as well and strain. 
  4. Add beans, green beans and salt to taste and simmer 7-10 minutes more until veggies are tender. Add pasta at the end and adjust seasoning. 
  5. Serve with a sprinkle of parmesan, if dairy is ok, and a slice of sourdough bread if desired. Enjoy! 

In health & happiness, 

Dr. Karen

Food Friday: Chocolate Dream Bars

dream bar.png

Craving a little chocolate on these hot days but everything just melts in your hand? Well I can't tell you these won't melt eventually in your hand but I can tell you they are a delicious health-ish snack or dessert for summer time! They taste like a delicious bite of candy bar that isn't too sweat yet satisfies your craving. 

I have made these from the Oh She Glows Cookbook #2 a few times now for get togethers and they have always been a big hit. Bonus is that they are gluten free, dairy free, AND nut free! Bonus #2 is that they are super simple to make. I tend to omit to seeds on the top, mainly because I always forgot. :) 

Ingredients:

Crust:

  • 1 tbsp coconut oil, melted
  • 1.5 cups crispy rice cereal (Mine is Nature's Path)
  • 2 tbsp unsweetened cocoa powder
  • just over 2 tbsp brown rice syrup (can find at superstore or sobeys)
  • pinch of sea salt

Filling:

  • 1 cup sunflower seed butter
  • 1/4 cup pure maple syrup
  • 1/4 cup melted coconut oil
  • 1 tsp pure vanilla extract
  • 2 pinches of sea salt

Coating:

  • 1/4 cup sunflower seeds, toasted (optional)
  • 3/4 cup non-dairy chocolate chips
  • 1 tsp coconut oil 

Directions:

  1. Oil a 10x6 in loaf pan and line it with a piece of parchment paper cut to fit the length of the pan. 
  2. In a medium bowl, mix together the crust ingredients until the cereal is full coated. Spoon the mixture in to the prepared loaf pan and spread it out evenly with the back of a spoon. With lightly wet hands, since it is fairly sticky, press the mixture down firmly and evenly into the pan. It may seen loose still but that is ok. Place in the freezer. 
  3. Rinse and dry the bowl and then combine all the filling ingredients and stir until combined and smooth.
  4. Removed the pan from the freezer and spoon the filling on top of the crust. Spread it out evenly with a spatula. Return the pan to a flat surface in the freezer and wait about 1 hour, or until firm.
  5. Once firm, in a small pot melt the chocolate and coconut oil over low-medium heat, stirring frequently, until smooth. Turn off the heat. Spread the chocolate quickly on top of the filling, fairly quickly to it doesn't harden up before you finish spreading it. Sprinkle the toasted sunflower seeds on now if using. Return the pan to the freezer for another 30 minutes or so. 
  6. When ready to eat, run a knife around the edges of the pan to loosen. Life out the slab using the sides of the parchment paper to pull it out. Run very hot water over a sharp knife for a minute then slice the bar into small squares and serve immediately. The hot knife will ensure you cut smoothly through the hard chocolate. Enjoy! Remember to put any leftovers in the fridge soon or they start to melt. 

Do you have any healthy summer treats you like to make?

In health & happiness,

Dr. Karen

Food Friday: Falafel Buddha Bowl

IMG_1320.jpg

Yum...buddha bowls! There is something about the name buddha bowl that just oozes warmth and joy for me. That is what this meal feels like, especially during a busy week when a little prep goes a long way. On cold winter days the last thing I want is a cold smoothie or raw veggies in a salad, so adding some roasted veggies with a delicious dressing is just right. 

This recipe is adapted from www.pinchofyum.com but the great thing about buddha bowls is that they can be changed around to your liking. I recommend sticking to this dressing from Oh She Glows though if you are adding the falafels as the flavours match so well. I love falafels as well since they have so much flavour and so easy to make. The other benefit of this meal is that each step could be made on a different day depending on your schedule. For example, I made the falafels ahead one evening, then roasted the veggies and made the dressing on the weeknight I had planned the meal for. Finally, this meal is gluten free and grain free depending on what flour you use for the falafels :) So enjoy and let me know if you come up with other delicious adaptations. 

Ingredients:

Servings - 3-4 bowls 

For the Falafels:

  • 2 cups cooked lentils - barely cooked for better falafel texture (or chickpeas for alternative)
  • 1 huge handful (a cup or so) fresh cilantro leaves and stems
  • 1 huge handful (a cup or so) fresh parsley leaves and stems
  • half a jalapeño 
  • 1 1/2 tbsp olive oil
  • 1-2 cloves garlic
  • a squeeze of lemon juice
  • 1 tsp salt
  • 2-4 tbsp gluten free flour - eg. Bob's 1:1 flour (or almond flour)

For the Roasted Veggies:

No room for brussels sprouts on this pan. 

No room for brussels sprouts on this pan. 

  • 3 carrots. peeled and cut into strips 
  • 1 head cauliflower, cup into bit size pieces 
  • large handful brussels sprouts, cleaned and halved  
  • 1/2 sweet potato, peeled and cut into strips
  • 2 tablespoons olive oil
  • 4 teaspoons cumin
  • salt and pepper to taste


For the Dressing: (makes 1 cup)

  • 1 large or 2 small garlic cloves
  • 1/4 cup tahini
  • 1/2 cup fresh lemon juice (2.5-3 lemons)
  • 3 tbsp nutritional yeast
  • 1/3 cup extra-virgin olive oil
  • 1/2 sea salt
  • freshly ground pepper

For the Buddha Bowls:

  • 1/4-1/2 head red cabbage, sliced/chopped
  • arugula or spinach 
  • roasted nuts and seeds - I did cashews, pumpkin and sunflower seeds
  • sprouts - optional 

Directions:

Then the dressing...the missing piece!

Then the dressing...the missing piece!

  1. For the falafels - Preheat the oven to 350F. Pulse all ingredients except flour in a food processor until combined. The mixture should form semi-dry crumbles that stick together when you press them. Stir in the flour – just one tablespoon at a time, until it’s just dry enough to handle. Form into 7-9 patties and bake for 18 minutes, flipped half way. Remove from oven. Refrigerate for a few days or freeze.
  2. For the dressing - In a mini/small food processor, process all ingredients until smooth. Taste seasoning and adjust nutritional yeast, olive oil and salt and pepper if needed. The dressing can be kept in the fridge for up to a week but will thicken in the fridge. 
  3. For the roast veggies - Preheat the oven to 400F. Place all the veggies on a roasting pan prepped with parchment paper. Drizzle all veggies except brussels sprouts with oil and sprinkle with cumin, salt, and pepper. Toss around on the pan to combine. Bake for 30 minutes – stir occasionally, but not too often otherwise you’ll disrupt the browning process. To get more browning, bake for an additional 10-15 minutes. When the veggies are done, remove from oven and set aside to cool.
  4. To assemble buddha bowl - Add arugula/spinach, cabbage to a bowl then top with roast veggies, nuts/seeds, falafel and drizzle with dressing. Take a bite! Or...Add all to a container for lunches and keep dressing separate until lunch time. I like to warm up the roasted veggies and falafels at work if I can and then mix all together, or even toast the falafel in a toaster oven if possible. 

In health & happiness,

Dr. Karen 

Food Friday: Pomegranate Chicken Tacos

Are you looking for a quick yet delicious meal that is still healthy? These pomegranate chicken tacos, aside from the wraps, are prepared in a slow cooker so they can be put together quickly when you get home from work! This recipe is great if you are on an elimination diet, avoiding gluten or just looking for a healthy option. They can be even made paleo if you use plantains to make the wraps or use fresh collard greens. 

I have made these tacos using different variations for a wrap and I have to say using homemade wraps makes the meal! You can find the recipe for brown rice tortillas here. It is so simple! I don’t own a tortilla press but using my hands, a rolling pin or a heavy pot to flatten them works just fine with the flour between two pieces of parchment paper. Leftover chicken can be added to lunches with a kale salad or something along those lines. 

Ingredients:

Chicken:

  • 1-1.5 lbs organic or local chicken breast, skinless, boneless
  • 1 cup pure pomegranate juice
  • 1 small onion, halved and cut into half-moons
  • 2 large garlic cloves
  • 1 tbsp extra-virgin olive oil
  • 2 tsp ground cumin
  • 2 tsp sea salt
  • 1/2 tsp freshly ground pepper

Tacos:

  • Brown rice tortillas (recipe here) or collard green leaves 
  • thinly sliced napa cabbage or romaine lettuce
  • sliced avocado
  • thin strips of cucumber
  • mayonnaise (vegan if prepared) 
  • broccoli sprouts (optional)

Directions:

brown rice tortillas.jpg
  1. Before work place all the ingredients of the chicken in a slow cooker. Cover and cook on low for 6 or so hours. Remove the chicken from the slow cooker and place it on a plate or cutting board. Using two forks, shred the chicken then place it back in the slow cooker and mix it into the cooked onions and juices. Let it cook uncovered for 10-15 minutes more. 
  2. During this time, make the tortillas using brown rice flour or almond flour and tapioca flour (I find this works better than arrowroot). Add more tapioca flour until you can easier form a ball of dough. Continue with recipe from here. Be sure to eat when tortillas are still warm to avoid them breaking too much. 
  3. To assemble the tacos, spread a small amount of mayonnaise on the tortilla. Place a scoop of the shredded chicken into the centre of each tortilla, then add a small handful of greens, a few slices of avocado, a small handful of cucumber and a tbsp broccoli sprouts. Fold in half and enjoy! It gets a little juicy so watch out 😃 

Let me know what you think!

In health & happiness, 

Dr. Karen